

How To Make A Good Flyer In Word
How to Create Flyers with Microsoft Word
The Complete Word Flyer Design Tutorial on One Page… for Word 2003, 2007 and 2010
This folio is a step-by-step tutorial on how to create flyers with Microsoft Give-and-take… with detailed instructions for Discussion versions 2003, 2007 and 2010.
I originally created this Word flyer tutorial in 2006 for clients who wanted to update their own marketing materials… but didn't ain Microsoft Publisher, which was the desktop publishing program I was using at the time.
My commencement flyer pattern tutorial was for Word version 2003 and I've updated the lessons since then to include the new tweaks for Word 2007 and Word 2010, which is the latest version I own.
You'll learn the basics of:
- Page margins
- Borders
- Font styles and sizes
- Font embedding'
- Paragraph indenting
- Paragraph and line spacing
- Inserting graphics
- Wrapping your text effectually graphics
- Resizing, repositioning, cropping and rotating graphics
- Working with Microsoft's Gratis templates
![]()
Set up Up The Quick Access Toolbar First
Discussion 2007-2010 users – here'due south how to place your most-used shortcut icons on your toolbar
Setting up your toolbar to include the icons you use most volition relieve you a ton of fourth dimension and frustration.
WORD 2007:
Click on the Function Button (the Windows symbol)
Click on Word Options
Click on Customize
Notice icons for the commands you use nigh in the "Cull Commands From" box on the left side and "ADD" them to the "Customize Quick Admission Toolbar" box on the correct side. Don't forget to click OK.
Discussion 2010:
Click on the File tab
Click on Options
Click on Quick Access Toolbar
Cull the commands you employ the about and desire handy and "ADD" them to the "Customize Quick Access Toolbar" box on the correct side.
Click OK
These are the shortcut icons I use:
New
Open up
Salvage
Save As
Undo
Redo
Impress Preview
Page Setup
You'll likely see others that you'll want to add, such as re-create and paste. (I utilise Control C and Control P for these).
To place these icons where you can hands see them, click on Add and when your list is complete in the right mitt box, you tin can rearrange them by using the up and downward arrows.
![]()
12 Flyer blueprint essentials – first hither
- White space effectually your text makes it easier for people to read your flyer's content. Try not to jam too much into i area.
- Edge DON'T: If you place your border besides close to the text, it makes it hard to read and people will tend to ignore what you take to say. (Run into more virtually borders below.)
- HEADLINE Practice: A catchy headline draws people in better than a boring headline. For super headline ideas, go a copy ofTested Advertising Methodsthe renowned classic by John Caples. Mine is highlighted, underlined and sticky-noted.
- SUBHEADS: Subheadings make your flyer text easier to read (breaks text into more manageable chunks) and allow people to scan your flyer for pertinent points. Folks should be able to scan your headline and subheads and know what your flyer is trying to tell them.
- Make sure you "ask for the sale." If you desire people to call y'all, make sure you say, "Call so-and-then at XXX-Xxx-XXXX" or "Call Thirty-XXX-XXXX to register earlier (date) for your early bird discount." Know what you'd like your reader to do… and ask them to do it.
- If your flyer is announcing a course or workshop, make certain all of your contact information is included. Besides, the time, place, and cost should exist easy to discover on the flyer.
- "Undo" YOUR MISTAKES – Learn how to employ the "undo" function. If y'all make a mistake and want to revert to what you lot had earlier you lot made the mistake (or chose a color yous didn't like, or placed a edge that didn't work, etc.), click on the Disengage option. You tin can disengage quite a few previous deportment by hitting "disengage" over and over. Cease undoing when you become back to where yous want to be… so you can kickoff over.IN WORD 2007 and 2010, discover Disengage past right-clicking (anywhere) on the Ribbon (toolbar with all the tabs), selecting Customize Quick Admission Toolbar, selecting the Undo icon, adding it to the department on the right and hit OK to save.
- Employ THESE TOOLBARS: To use Discussion for flyers, make sure you have the right toolbars open (then your shortcuts – represented past those little graphical icons – are visible and handy): Go to View; Toolbars; and make sure these are checked: Standard, Formatting, Cartoon, Picture, Reviewing and PDF Maker. See below for Word 2007/2010 how-to'due south.
- It's easiest to run into what your finished flyer will expect similar if you lot're viewing it in "Print Layout." On the top line, click on View, so Print Layout. In Give-and-take 2007 and 2010, find the Impress Layout option at the View tab.
- AUTOCORRECT OPTIONS: In Word 2003, choose these "autocorrect" options at Tools, Autocorrect Options, Autoformat: Check "replace straight quotes with curly quotes" and "replace hyphens (–) with dash." I similar to UNcheck automatic bullet and number lists, because they pop up when I don't need 'em. I tin always add a number or bullet list quickly using the icons on my toolbar instead.For Discussion 2007, click on the Office Button, click on Give-and-take Options, click on Proofing, and so click on AutoCorrect Options and choose your preferences. In Give-and-take 2010, you tin can click on the File tab, then Options, then Proofing. The AutoCorrect options are at the tiptop of the pop-up folio.
- In Word 2007 and 2010, you tin can catechumen your Give-and-take flyer to a PDF certificate past using the "Save Every bit" role.
- Don't forget toEMBED YOUR FONTS if you lot're emailing your flyers (come across how below).
![]()
(1) Set Your Page Margins
Sufficient white space sets off your text for easier reading
To set your meridian, bottom, correct and left margins and so that you accept enough space for a border outside your text, go to:
WORD 2003:
File (information technology's on the top line)
Page Setup (from the drop-down menu)
WORD 2007 and 2010:
Click on Folio Layout tab
Click on the Margins drop-downward box
Cull the default margins or customize for your ain preferences
I like to use a minimum of 1″ for margins, fifty-fifty up to one.25 inches, depending on how much text I have.
In Page Setup (Word 2003) or Page Layout (Give-and-take 2007-2010), you can change your header and footer settings to 0 inches if you don't demand page numbering, or a title across the top of all the pages, or a copyright notice on the bottom of all the pages. For a i-page flyer, endeavor 1 to 1.25 inches for your margin, with no headers and footers.
(2) Make a Border Around Your Folio
Page borders (not text box borders)
For a simple edge around your page (and not effectually your text box), go to:
WORD 2003:
File
Folio Setup
Layout
Click on Folio Borders button
Click on Box (or shadow box or 3-D box)
Choose the Style y'all want (plain border, dashed, dotted, zig-zag, double line, shaded line, etc. Cull these from the drop-down menu).
Choose the Colour you desire (a) from the drop downwardly box… or (b) click on More Line Colors to see additional colors.
Discussion 2007 and 2010:
Page Layout tab
Folio Borders
At Settings, cull the box type you want (box, shadow, 3-D, custom)
Choose style (solid, dotted, etc.)
Cull color
Cull the width (thickness) of the line
Choose ART if you want a graphical edge around your page
Click Options to set your border farther away from (measure from) the "Edge of Page" or your "Text" box.
Increase the number of points that y'all want between your text and border.
![]()
TEMPLATES – Create Flyers the Easy Fashion
If you find a pre-designed format that works for you lot… it simplifies everything.
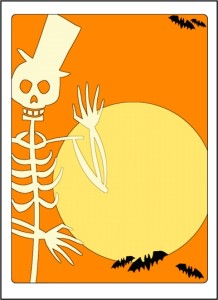
If yous don't like designing "from scratch," hither'due south a fashion to make flyers speedily and easily. (The flyer below is a stock template I found using the instructions for Word 2010 below.) You lot can too click here to access boosted templates at Microsoft.com.
Flyer template – just add words
In WORD 2003, click on FILE, then NEW.
On the correct side of the screen, y'all'll encounter a number of options.
Ringlet down to see all the template options. Click on FLYERS.
Click on the flyer option you lot'd like to work with, choosing: Event, Marketing, Real Estate or Other.
Then curlicue through the numerous possibilities and click on ane you'd like to use for your flyer.
You'll be taken to a Download folio. Click the DOWNLOAD button and this will open a new Give-and-take document, which you can immediately kickoff working with. Simply change the template's wording for your own and impress.
Give-and-take 2007:
To make a new flyer from a template, click on "New."
Under Microsoft Role Online, find "Flyers" and click on it.
You lot can enter a search term for a specific type of template (eastward.grand. – "open house" or "birthday party.")
Or choose the options listed: Event, Marketing, Existent Estate or Other Flyers.
Click the Download button to open the template on your ain reckoner. Y'all can enter the text in the boxes already there or delete them and place your own. Run into beneath for how to insert graphics.
WORD 2010:
Click on the File Tab
Click on New
Click on Flyers (y'all'll take a huge array of options in addition to flyers, including souvenir certificates, greeting cards, resumes, etc.)
Search through the 9 files for a design y'all similar and double-click to download it.
Supercede the text with your own and SAVE AS a new title in a file binder in the documents section of your calculator (or desktop).
In Give-and-take 2010, you can also add together a theme to your flyer.
Click on the Folio Layout tab
Click on Themes
You can automatically change font types and colors for your unabridged document. Experiment with Themes to see which ones you like.

(3) How to Choose and Work with Fonts
Fonts are important… if you want people to actually read your flyer
You can blazon all your text offset… and and so change the fonts from whatever is gear up as your "default" font (often Times New Roman) or you tin can enter text and modify it as you go along.
To change fonts within a document or flyer, select the text you want to alter and click on:
WORD 2003:
Format
Font
Choose a stiff, bold headline font for the main heading. Y'all could use this same font in smaller type or in italics for your subheads.
Type your headline. If yous desire to brand information technology look fancier, you lot could format it with WordArt: Select your headline text, click on Insert, Picture, WordArt and choose the WordArt shape and colour you like. The Edit WordArt Text box pops up where you tin can change the font style and size to fit your flyer. If y'all correct click on your WordArt text, a box pops upwards that lets y'all practice even more.
For the main text of your flyer, choose an easy-to-read font. A "serif" font such every bit Times New Roman works well if in that location is lots to read. If yous don't accept a lot of text, a sans-serif font such as Arial or Futura works well.
Try not to employ more than 2-3 different fonts inside one flyer or certificate. If you want text to stand up out, you could utilise the italics and bold options for diversity. Don't underline too much either – just a single word hither and at that place – otherwise your text will exist besides hard to read. If you like fancy fonts, they're okay for brusk headings, but not for blocks of text.
Commencement with an eleven or 12 point size until you see how much space it all takes up. You can e'er select the text and become back to Format, Font to modify the size or bolding/italics, etc. Your toolbar should testify the font names and sizes in drop-down menus, which makes irresolute your font types and sizes even quicker and easier. Make sure your "Formatting" tool bar is checked to admission this feature.
You'll detect some fancier font options for embossing, outlining, underlining, color, etc. Play with these to run into what looks good. Y'all tin even take different colors for the text and underlining.
Discussion 2007 and 2010:
At the Home tab, choose the Font Type and Size from the drop down boxes.
Or choose Theme for your document (Page Layout tab, click on Themes).
![]()
(3a) How to EMBED Your Fonts
This is a MUST if you email your flyers as Word documents.
*** EMBED YOUR FONTS if you're planning to email your flyer or brand a PDF file of your flyer.Non everyone has the same fonts on their computer and if you lot don't embed your fonts when yous send your flyer to someone else, information technology could cease up looking very different.
Word 2003:
Go to Tools, Options, click on the Save tab, and cull Embed True Type Fonts. Save your changes.
WORD 2007:
Click on the Office Button
Click on Word Options
Click on Save
Check the box for "Embed fonts in the file"
Y'all can as well check the box "Do non embed mutual arrangement fonts" to relieve memory space
WORD 2010:
Click on the File tab
Click on Options
Click on Save
Check the box for "Embed fonts in the file"
You tin can as well check the box "Exercise not embed mutual organization fonts" to salve memory space.
![]()
(4) Format Your Paragraphs
This automates so much of your work
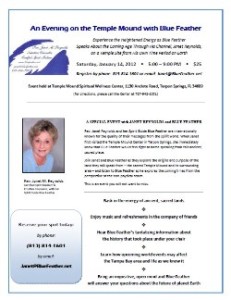
You tin make things easier on yourself by setting up your paragraph formatting ahead of fourth dimension. Just make sure yous outset place your cursor somewhere in the text you lot wish to format. In the graphic to the right (a flyer I created for a client), you'll see examples of centered, flush left and justified text… all in different text boxes.
WORD 2003:
Ready your paragraph alignment by clicking on:
Format
Paragraph
Full general: Alignment
From the Alignment drop-down box, cull Left, Right, Eye or Justified.
Set your indentations side by side:
Format
Paragraph
Indentation
For equal indentations to set off a paragraph inside a larger section of text, use the left and right indentations, making sure the numbers are equal.
For Commencement Line Indent, cull .two inches to kickoff with and encounter how it looks. This will indent ONLY the offset line of each paragraph.
Set up line spacing adjacent:
Format
Paragraph
Line spacing
Yous tin set your spacing between lines to single infinite, 1.five lines of spacing or double infinite. There's also a "custom" option that lets you be even more than exact. Y'all can use "at least" or "exactly" and set your line points in relation to the points of your font size. Don't be afraid to play with this, because information technology's easy to change. The aim is to make it piece of cake for people to read your flyer.
Prepare paragraph spacing:
Format
Paragraph
Spacing
You can gear up paragraph spacing for the entire certificate or for just 1-2 paragraphs at a time using the Spacing drop-downward menus. Using this option helps you create a more professional-looking document than if you just hit "enter" twice for paragraph spacing.
You can create more than white space above and beneath your text using the two menus "Higher up" and "Below." They testify increments of six points, but y'all can type in any number you wish, if you want less or more than 6, 12, or 18 points betwixt paragraphs.
Choose points based on your font size. If yous're using 12 signal Times New Roman, 12 point spacing is close to double spacing, except yous don't have to hit enter twice. For most print documents, double spacing or 12 points between paragraphs looks excessive. Simply if y'all don't have much text, 12 points between paragraphs helps y'all to stretch things out.
WORD 2007-2010:
Ready paragraph alignment at Home tab
Choose left, eye, right or justify from the icons in the Paragraph department of the toolbar
Set Drop Cap at the Insert Tab
Indentation:
Go to Page Layout tab
Open the Paragraph drop-down box by clicking the shaded tiny box on the bottom right
Enter the corporeality of indentation you lot want for the unabridged paragraph.
Beginning Line Indent:
For First Line Indent, use the Special driblet-down tool and select 1st line, and then select the amount of space you want to utilise for indenting the first line. Subsequent paragraphs will be indented by the same corporeality. Endeavour .two to start with and run into if you lot like how it looks. No more "tab indenting."
Line Spacing:
Set line spacing at the Domicile tab
Paragraph section
Line spacing drop-downwardly box (information technology has picayune upwardly-down arrows)
Cull the spacing y'all desire betwixt lines of text
This sets spacing between lines automatically
Paragraph Spacing:
Ready paragraph spacing at the Folio Layout tab
Go to the Spacing section
Place your cursor in the paragraph you wish to create spacing automatically for. You lot can choose to increase spacing above or below the paragraph. Select the corporeality of spacing yous desire – 6 points "after" is what I usually choose – and this will now space all subsequent paragraphs by half dozen points. No more than hitting the Enter key twice.

(5) Working With Graphics and Photos
Finally! Microsoft Word makes working with graphics and so much easier
Hither are a few tips for placing and editing your graphics and for wrapping your text around the graphics.
WORD 2003:
INSERT your graphic:
At the superlative of the screen, click on:
Insert
Picture (drib-down bill of fare)
Choose what you'll insert from another drop-down menu. For simplicity here, let's just await at Clip Art.
(Hopefully, the graphic "Files on Your Computer" are stored in your "My Pictures" files, making them easy to find past going to Insert, Pic, From File, My Pictures. Your pictures downloaded from the Microsoft.com online clip art gallery could also exist in a subfile of My Pictures called Microsoft Prune Organizer.)
Okay, then nosotros're dorsum at:
Insert
Film
Prune Art
In the menu area to the right of your text expanse, yous'll run across a "Search" box. Enter the keyword for the clipart graphic you need for your flyer (candle, nurse, lighthouse, Christmas, happy people, etc.) and select "All Collections" and "All Media File Types" for the nearly numerous results. If you know you just want a photo, click on the drop-downwardly pointer and uncheck everything except "Photographs." If you lot just want clipart (no movies, sounds or photos), uncheck everything except clipart. Click on the Search button.
A number of graphics choices volition appear and yous just click on the i(southward) you want and they'll exist placed on your flyer. See how to movement them below.
RESIZE your graphic:
The original motion picture will most probable exist also big for your flyer, and y'all can easily resize it past left clicking on information technology, and pulling IN from one of the corners. Or you lot tin can click on the flick, and so RIGHT click on it and a box called "Format Picture" opens. Click on the size tab and specify in inches the desired height and width for your flick.
ROTATE your graphic:
In this same department of Format Picture (correct click on the graphic), y'all can rotate your graphic by entering the number of degrees you'd similar the picture to turn. If you'd like it rotated to the left, make sure to place a minus sign (-) before the number of degrees.
MOVE your graphic:
To move your pictures on the page, left click the picture, concur information technology down with the mouse while dragging it to where yous'd similar it placed.
WORD 2007-2010:
To add graphics and photos, go to the Insert tab.
Click on "Picture" if the graphic is on your figurer or "Clip Art" to access Microsoft's clip art collection.
Edit clip art by right clicking on the graphic… y'all can even remove $.25 of the picture, if you desire.
Double click on the graphic to open up the Format Graphic section. Many new options are now arrayed on the toolbar.
Here you can add together shadows, borders, rotate or flip the graphic, crop a section of the picture, wrap text around it and more than.
You can as well change the brightness and contrast and re-colour the graphic.
In Word 2010, you can exercise many, many things with graphics in Word that were non possible in previous versions. Actually worth the price of the software, if you employ Word primarily for your flyers and other marketing documents.
![]()
(six) Format Your Graphics and Photos
Word has greatly improved its graphics functions
WORD 2003:
Convert your motion picture from color to GRAYSCALE or play with color combinations:
Alter a colour graphic to grayscale by right clicking on the graphic, then click on the Picture tab. At the Image Control driblet-downwardly menu y'all tin play with Color, by choosing automatic, grayscale, black and white or washout. You tin increase brightness and contrast here, likewise.
CROP your film:
You can besides ingather the motion-picture show on this section of Format Picture… or use the "Crop Tool" on your toolbar… it looks like two diagonal XXs. Click on the graphic then on the crop tool and drag in the sides or corners to give your picture the expect you want. You can remove sections of the background and other people and things you don't want showing in your graphic.
Make a Border for your graphic:
Right click the graphic. Click on "Borders and Shading" on the drop-down menu. Click on the "Borders" tab and check "Box." Choose the type of border you lot'd like: single line, double line, dotted line, zigzag, etc. and cull the color and width of the line from the drop-down menus.
WRAP TEXT around your graphic:
Right click your moving picture, click the Layout tab, and choose how you'd similar your text to wrap around your picture. If you want white infinite on the sides of the graphic, choose the first option "In Line With Text." This puts your showtime line of text at the lesser correct of the graphic (the default that Microsoft Discussion gives for this pick).
If you want your text to offset above beside your movie, cull "Square" or "Tight." You can besides type text on top of the graphic – just make certain that "behind text" is selected in the "Wrapping Styles" section.
ROTATE/FLIP your graphics:
Is your photo facing the wrong way into the text? A photo placed on the left of the page should look toward the right – drawing the reader's eye INTO the text. A photo placed on the right should be looking into the text toward the left. If y'all demand your photo in a specific place for the design, merely the eyes/face are looking in the wrong direction, you lot can flip the photograph horizontally.
Make sure your Drawing toolbar has the pyramid-looking icons (flipping tools). If it doesn't, go to View, Toolbars, Customize, Drawing… gyre down for the rotate and flip choices and DRAG them to the toolbar (along with any other not bad shortcuts that caught your eye. They save going to Format, Pic, etc.)
Flip your photo by left clicking on it, then clicking on the dorsum-to-back pyramid-looking things on the toolbar (one gray, one majestic). Your photograph should now be looking in the management you demand.
Give-and-take 2007-2010:
All of these functions are available when you right click the graphic and select Format Picture… or click on the "Format" tab for even more than options.
You tin too do quite a lot with your graphics using Microsoft Motion-picture show Manager, which is included every bit a "tool" in the Microsoft Office packet.
© 2006-2015 Barbara Casey
If you'd like to buy this tutorial for your Kindle, here'south the Amazon page: Tutorial Lady's Guide to Designing Attractive Flyers with Word 2003, 2007 & 2010 (Tutorial Lady Guides)
Source: https://barbaracasey.com/how-to-create-flyers-with-microsoft-word/
Posted by: figueroacaushe.blogspot.com
0 Response to "How To Make A Good Flyer In Word"
Post a Comment